Do I need a custom PCB?
Sooner or later every hardware idea runs into the same question: should it be built on a popular platform like Arduino or Raspberry Pi, or does it need its own printed circuit board? The honest answer is "it depends" — mostly on how far along the project is. Here is how I think about it.
First, what is a PCB?
A PCB is a printed circuit board: the flat board, usually green, that holds and connects the electronic components in almost every device. Copper traces on the board replace loose wires and form all the electrical connections. The components — chips, resistors, connectors and so on — are soldered onto it. Without a PCB you would have a mess of individual wires; with one, the circuit is compact, reliable and manufacturable.
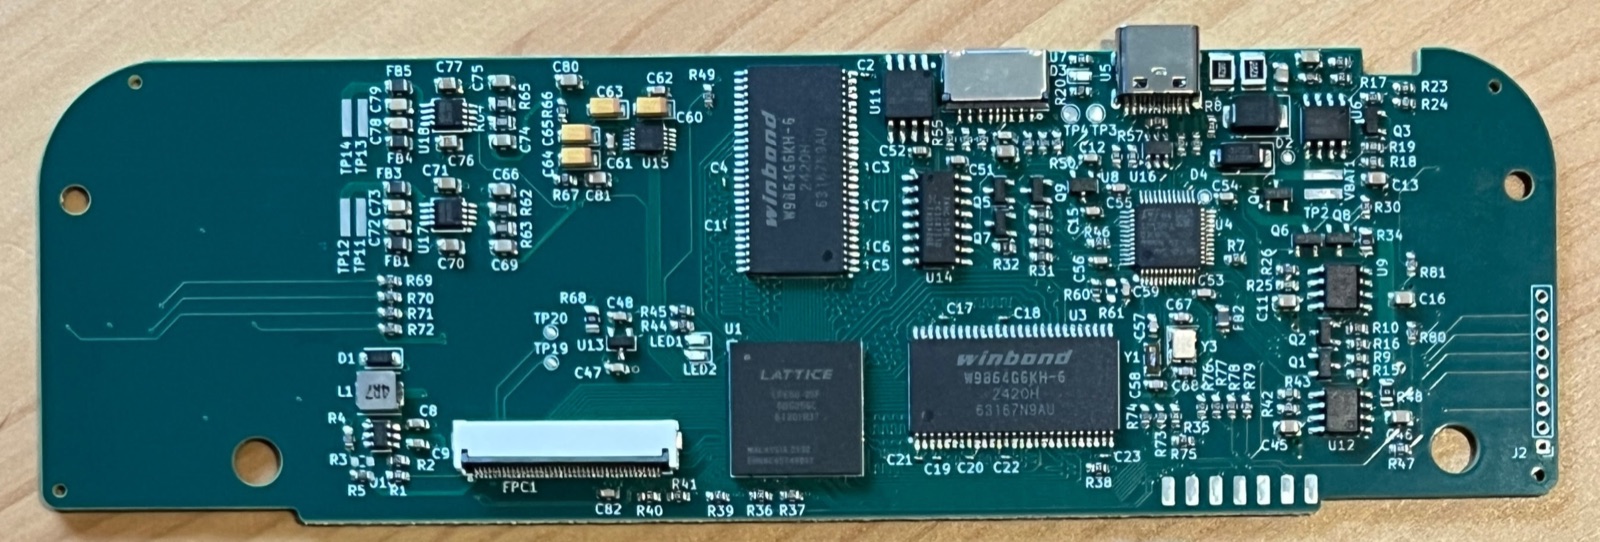
An Arduino or a Raspberry Pi is a PCB too, of course. The difference is that it was designed for everyone, not for your product. That is exactly what makes it so useful at the start, and so limiting later on.
Stage one: start with an existing platform
At the beginning, with a fresh idea to validate, you should definitely start with an existing product like Arduino or Raspberry Pi. You save money and time by focusing on what really matters at this stage — the MVP software and the question of whether the idea works at all. This is the quickest way to an early demo, and an early demo is usually what gets a project funded.
Off‑the‑shelf platforms are hard to beat here:
- They are available today. No design work, no waiting weeks for a manufacturer.
- They are well documented. Libraries, examples and forum answers exist for almost every sensor and display you can think of.
- They are forgiving. If a part turns out to be the wrong choice, you unplug it and try another one.
- Software written for them can be reused. If the business logic is kept separate from the hardware‑specific code, most of it will move to the final board with little change.
The price you pay is in looks and reliability. A prototype like this typically ends up as a Raspberry Pi, a couple of add‑on boards, a touchscreen, a keyboard and a mess of wires — quite a chaos:
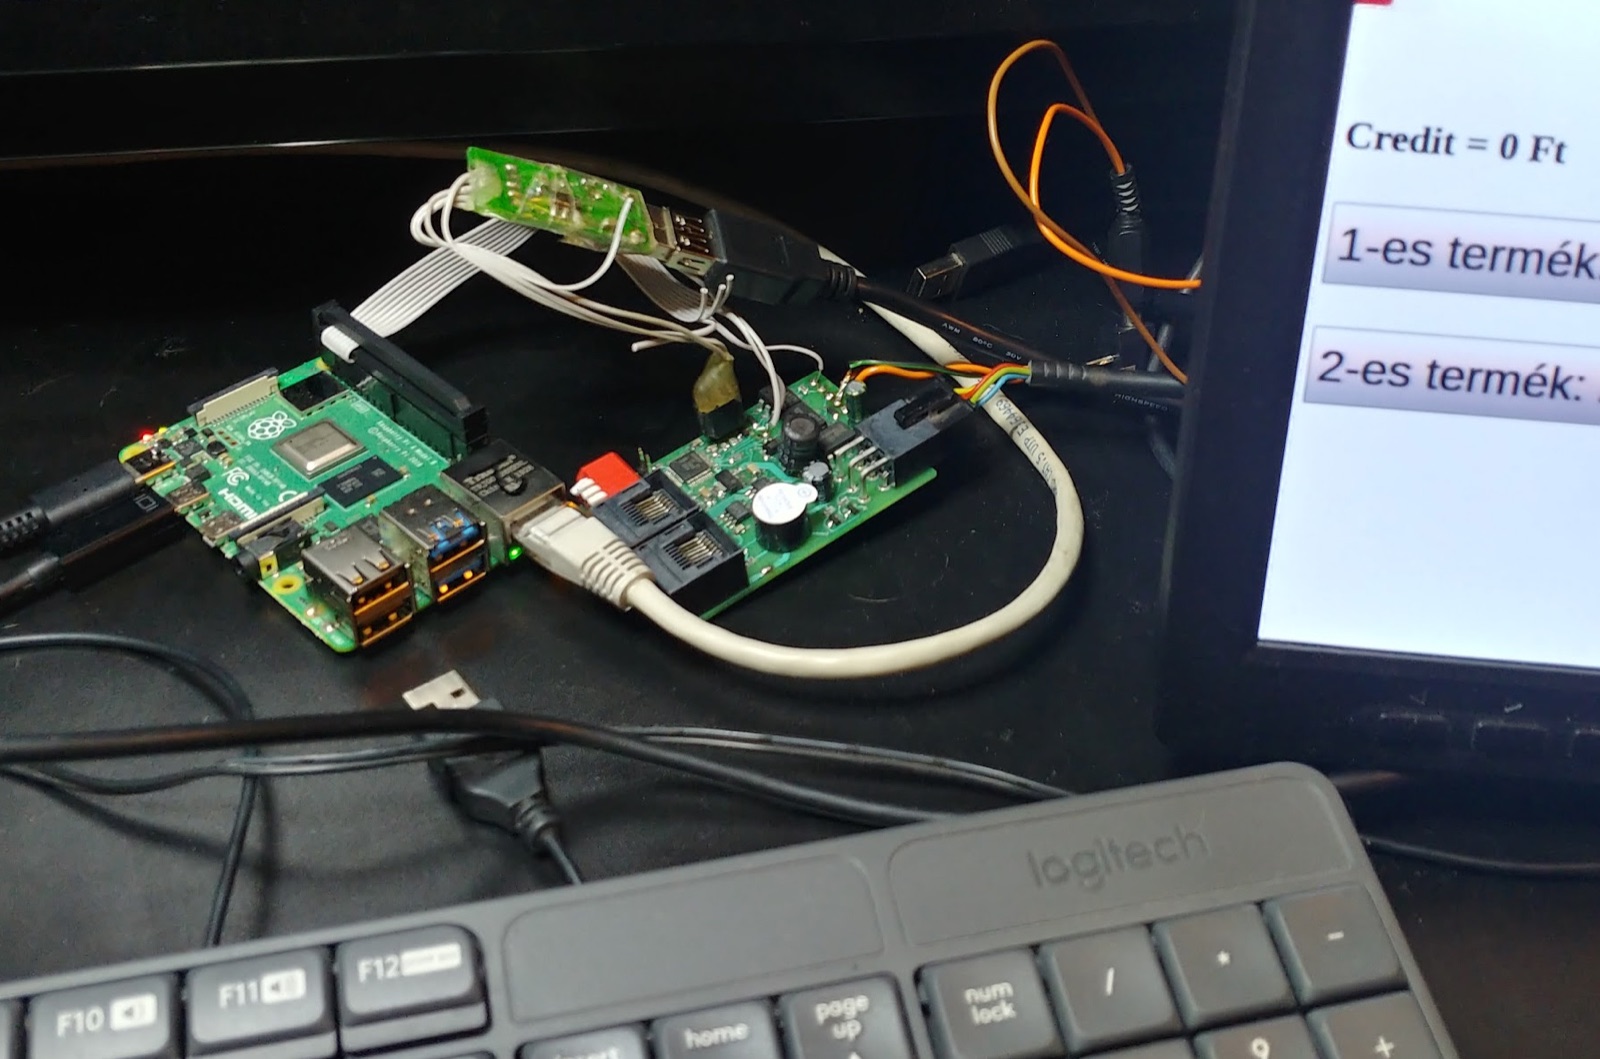
That is perfectly fine on a workbench, and even in a first meeting with investors. It is not fine in a product.
Stage two: a custom PCB
Down the road, when you are confident about the idea and have the resources to continue, you should have a custom PCB that includes all your components. There are many reasons to do that. The product not only looks more professional as a single‑board solution, it is also:
- Scalable to production. One board can be ordered fully assembled, in any quantity, instead of hand‑wiring several modules for every unit.
- Smaller. You only include what you need, laid out to fit the enclosure instead of the other way around.
- More reliable. There are no connectors to work loose, no wires to break, and no stacked boards to rattle around.
- More efficient. A general‑purpose computer burns energy on things your device never uses; a tailored design can run from a smaller power supply or battery.
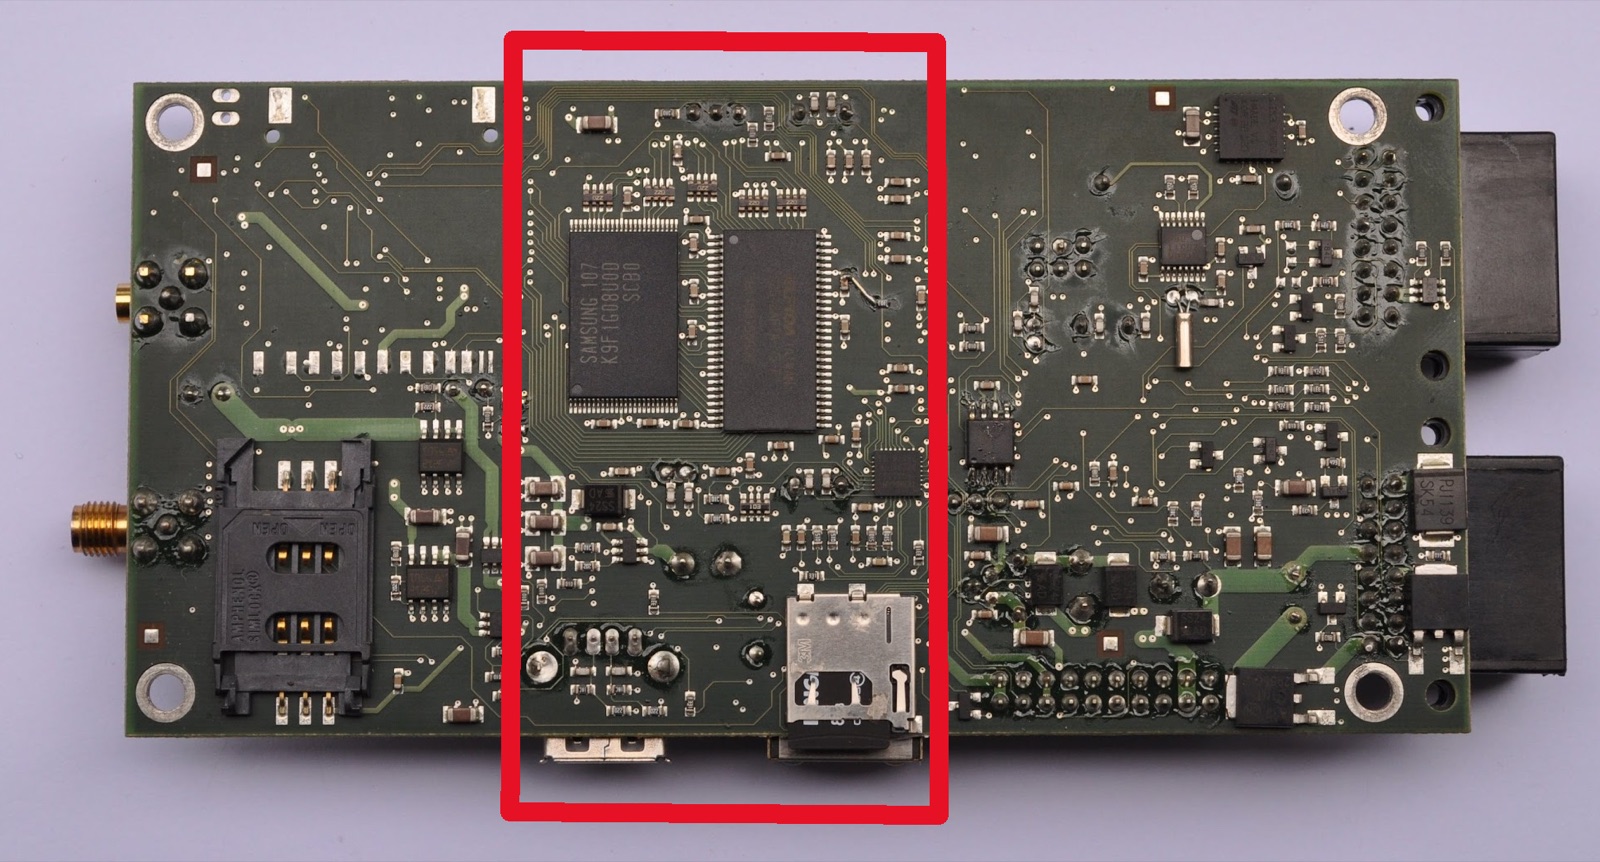
The board below is a custom PCB prototype that replaces four separate boards. The area marked in red is an embedded Linux computer — similar to a Raspberry Pi, but less powerful, cheaper and lower‑power, tailored to this specific project.
There is a middle ground
Going custom does not have to mean designing every part of the computer from scratch. Many products put a ready‑made module on their own board: a compute module, a system‑on‑module with the processor and memory, or a certified Wi‑Fi module. The difficult, high‑speed part of the design comes pre‑built and tested, while the rest of the board — power supply, connectors, sensors, drivers, protection — is shaped around the product.
This is often the sweet spot for the first production version. It removes most of the wiring chaos, keeps the risk low, and still leaves the door open for a fully integrated design once the volumes justify it.
Signs it is time to go custom
There is no exact moment, but these are the signals I look for:
- The requirements have stopped changing every week.
- The device needs an enclosure, and the off‑the‑shelf boards don't fit in it.
- You need more than a handful of units, and wiring each one by hand is becoming a job of its own.
- Power consumption or battery life matters.
- The device switches mains voltage or will be touched by users, so safety features such as isolation and protection have to be designed in rather than bolted on.
- The product will need certification (for example the CE mark in Europe), which is much easier to pass with a well‑designed single board than with a stack of modules and cables.
And the signals that it is too early: you are still discovering what the device should do, nobody outside the team has tried it yet, or the next demo is next week.
What going custom involves
A custom board is less of a leap than it sounds. The work is roughly:
- Schematic — the logical design: which components, and how they connect.
- Layout — turning the schematic into copper: placing parts and routing every trace, with wider traces for power and careful routing for fast signals.
- Manufacturing — sending the files to a PCB house, which today can also source the components and assemble the board.
- Bring‑up — powering up the first boards, checking every part of the circuit and porting the firmware.
- Iteration — the first version is rarely the last. Expect at least one more round once real testing starts.
The two case studies on this blog show what this looks like in practice: a small kitchen safety device that went from a pile of relays to a custom board, and a handheld touchscreen prototype that took two board revisions.
The short version
Start on an existing platform, and keep your software portable so it can move later. Once the idea is proven and the requirements settle down, move to a custom PCB — possibly built around a ready‑made module — and the product will be smaller, more reliable and ready for production. The mistake is not choosing one or the other; it is choosing the right one at the wrong time.